cloudfront-distribution
This module sets up a cloudfront distribution for you.
- It can be tailored towards serving static websites/files from an Opta s3 bucket (currently just for a single S3, but will expand for more complex usage in the future). Now, hosting your static site with opta can be as simple as:
name: testing-cloufront
org_name: runx
providers:
  aws:
    region: us-east-1
    account_id: XXXXXXXXXX
modules:
  - type: aws-s3
    bucket_name: "a-unique-s3-bucket-name"
    files: "./my-site-files" # See S3 module for more info about uploading your files to S3
    name: testmodule
  - type: dns
    domain: staging.startup.com # Fill in with your desired domain, or remove this whole entry if handling dns outside of Opta
    delegated: false # Set to true when ready -- see the "Configure DNS" page
    linked_module: cloudfront-distribution
  - type: cloudfront-distribution
    links:
      - testmodule
Once you Opta apply, run opta output to get the value of your cloudfront_domain. index.html is automatically served at this domain.
2. It can be tailored to serve as a CDN for the Load Balancer for the Cluster.
name: testing-cloufront
org_name: runx
providers:
  aws:
    region: us-east-1
    account_id: XXXXXXXXXX
modules:
  - type: base
  - type: dns
    domain: staging.startup.com # Fill in with your desired domain, or remove this whole entry if handling dns outside of Opta
    delegated: false # Set to true when ready -- see the "Configure DNS" page
    linked_module: cloudfront-distribution
  - type: k8s-cluster
  - type: k8s-base
    name: testbase
  - type: cloudfront-distribution
    # Uncomment to add an AWS WAF to your cloudfront distribution
    # web_acl_id: "your_web_acl_id_or_arn"
    links:
      - testbase
Non-opta S3 bucket handling
If you wish to link to a bucket created outside of opta, then you can manually set the bucket_name and
origin_access_identity_path fields to the name of the bucket which you wish to link to, and the path of an
origin access identity that has read permissions to your bucket.
Cloudfront Caching
While your S3 bucket is the ultimate source of truth about what cloudfront serves, Cloudfronts flagship feature is its caching capabilities. That means that while delivery speeds are significantly faster, cloudfront may take some time (~1hr) to reflect changes into your static site deployment. Please keep this in mind when deploying such changes. You may immediately verify the latest copy by downloading from your S3 bucket directly.
Domain / DNS
If you are ready to start hosting your site with your domain via the cloudfront distribution, then go ahead and follow the configuring dns guide, which will also set up your SSL. Traffic should start flowing from your domain to your cloudfront distribution and on towards your S3 bucket / K8s cluster. You could also manually configure DNS / SSL from outside of Opta using the following steps:
- Remove the dns module entirely from your yaml, if you haven’t already.
- Get an AWS ACM certificate for your site. Make sure that you get it in region us-east-1. If you already have one at hand in your account (e.g. from another active Opta deployment), then feel free to reuse that.
- Validate the certificate by adding the correct CNAME entries in your domain’s DNS settings. Specific instructions for popular domain providers are explained here.
- Fill in the
acm_cert_arnfield for the cloudfront module with the arn of your cert. - In your hosted zone, create either an A record (if it’s on the same AWS account) or a CNAME pointing to the cloudfront
distribution url (the
cloudfront_domainoutput). Alternatively, if it’s a hosted zone on the same AWS account you could pass thezone_idto the cloudfront module to have Opta automatically take care of this for you. - Fill in the
domainsfield to include the domains for which you have the certificate for (no need to include wildcard repetition, that’s automatic). - Opta apply and you’re done!
AWS WAF with Cloudfront
AWS WAF is a web application firewall that helps protect your web applications or APIs against common web exploits and bots that may affect availability, compromise security, or consume excessive resources. In this section we explain how to configure AWS WAF with your Cloudfront distribution.
As a pre-requisite, follow the steps in the previous section (Using your own domain) to create a and validate a certificate for the custom domain. After completing those steps, users have the ability to access your services at https://your-custom-domain; and because your CNAME record for your custom domain points to the cloudfront distribution URL, traffic will be directed through your cloud-front distribution.
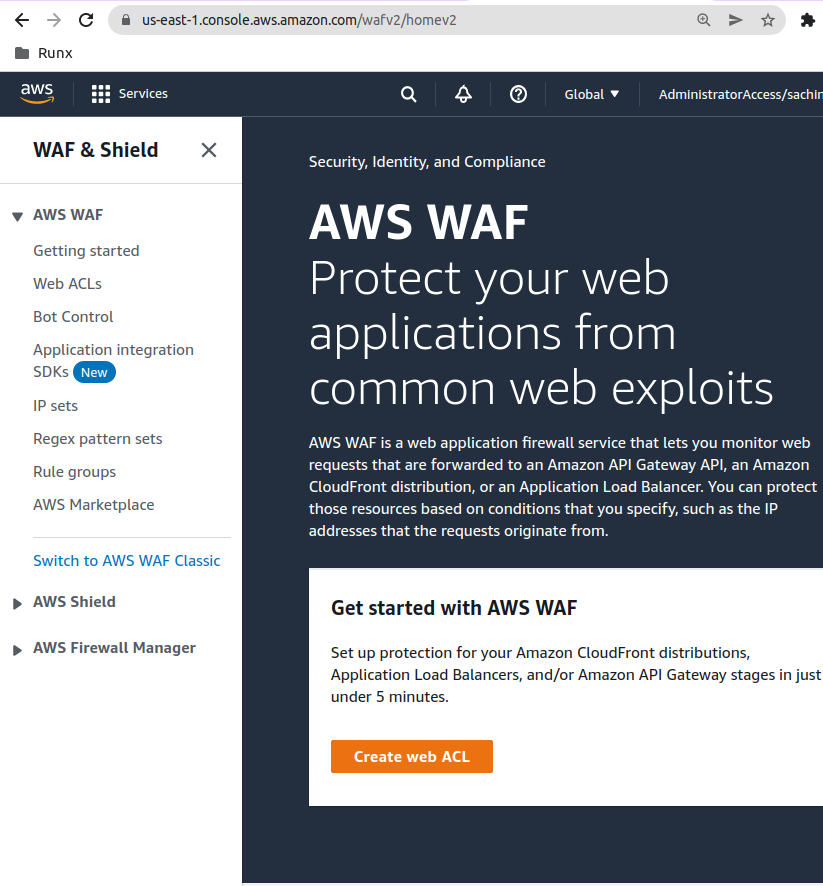
Next, we need to create an AWS WAF to protect our service and cloudfront CDN cache. We do this via the AWS WAF GUI.
Here are a few screen shots showing how the WAF GUI values can be configured for a “passthrough” WAF to start with.
We start at the WAF landing page in the AWS Console:
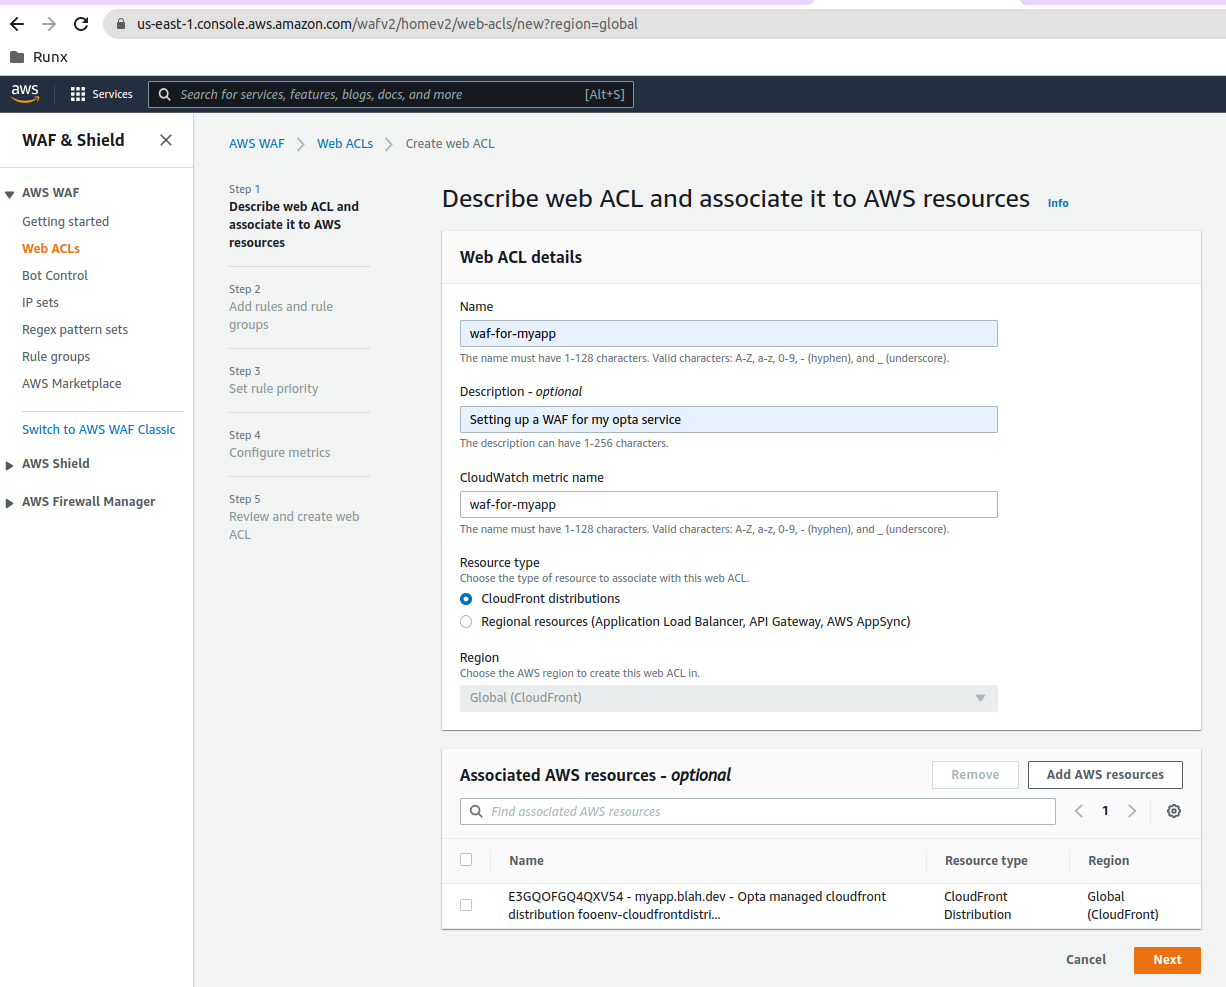
We configure the WAF to use the cloudfront distribution we created with Opta; this can be selected by selecting the Cloudfront distribution radio button and then clicking on the Add AWS Resources button to select the cloudfront distribution; you should then end up with something like so:
The initial configuration of the WAF allows all traffic:
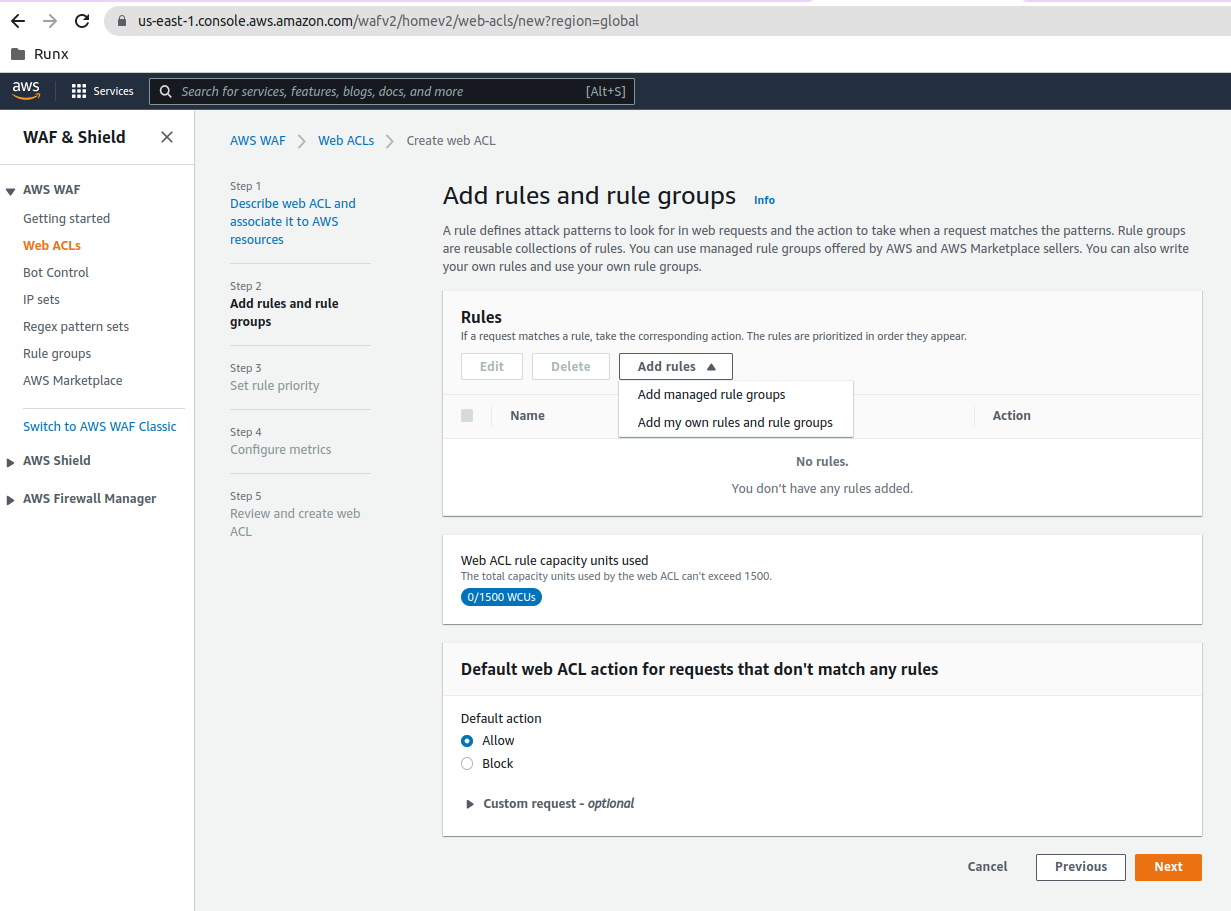
Finally, please configure AWS WAF rules for your specific application protection needs.
Lastly, make sure to pass your new WAF to Opta by setting the web_acl_id input (if you’re using WAFv2
set it to the arn of the ACL created, if you used AWS WAF Classic, then use the ACL ID).
Fields
| Name | Description | Default | Required |
|---|---|---|---|
bucket_name |
The name of the s3 bucket to link to this cloudfront distribution | `` | False |
origin_access_identity_path |
The Cloudfront OAI path to use to access the buckets | `` | False |
default_page_file |
The name of the existing s3 object in your bucket which will serve as the default page. | index.html |
False |
status_404_page_file |
The name of the existing s3 object in your bucket which will serve as the 404 page. | None |
False |
status_500_page_file |
The name of the existing s3 object in your bucket which will serve as the 500 page. | None |
False |
price_class |
The cloudfront price class for this distribution. Can be PriceClass_All, PriceClass_200, or PriceClass_100 | PriceClass_200 |
False |
acm_cert_arn |
The ACM certificate arn you wish to use to handle ssl (needed if you want https for your site) | `` | False |
domains |
The domains which you want your cloudfront distribution to support. | [] |
False |
links |
The linked s3 buckets to attach to your cloudfront distribution (currently only supports one). | [] |
False |
allowed_methods |
HTTP methods CloudFront processes and forwards to your Amazon S3 bucket or your custom origin. | ['GET', 'HEAD', 'OPTIONS'] |
False |
cached_methods |
CloudFront caches the response to the specified HTTP method requests. | ['GET', 'HEAD', 'OPTIONS'] |
False |
zone_id |
ID of Route53 hosted zone to add a record for. By default uses the one created by the DNS module if the module is found. | `` | False |
extra_headers |
Extra headers to forward pass cloudfront | [] |
False |
web_acl_id |
The ID of the WAF ACL to add to cloudfront | None |
False |
Outputs
| Name | Description |
|---|---|
cloudfront_domain |
The domain of the cloudfront distribution |
Feedback
Was this page helpful?
Glad to hear it! Please tell us how we can improve.
Sorry to hear that. Please tell us how we can improve.