VPC Peering
What is VPC Peering?
VPC peering is the standard way of opening private network communication between 2 AWS VPCs. This means a server/lambda function/container/etc… in one VPC can send requests to a private IP (e.g. another server, a database, etc…) in the other network, without touching the public internet.
This ability is extremely useful if one wishes to connect different Opta environments (or a pre-existing VPC and an Opta environment) together without any serious security risk. This guide will show you step-by-step instructions on how to do it.
Limitations
VPCs can peer from cross AWS account and even cross region with minimal difficulties, but they can never peer with another VPC that shares an overlapping CIDR block.
There are also a series of limitations on the connection but, from our experience, the only one seriously encountered is that AWS security groups do not work across VPC peerings in different regions or accounts. You will need to whitelist by individual IPs or CIDR blocks.
Click [here](AWS security groups do not work across VPC peerings) for the official list of limitations.
Send the VPC Peering
The first step in peering a VPC is to send the peering request on behalf of one of them. It does not matter which VPC initiates as the peering described here will be symmetric. To do so, go to the AWS UI console on your web browser, open the VPC service homepage, and on the left bar search for “Peering Connections”. CLick it
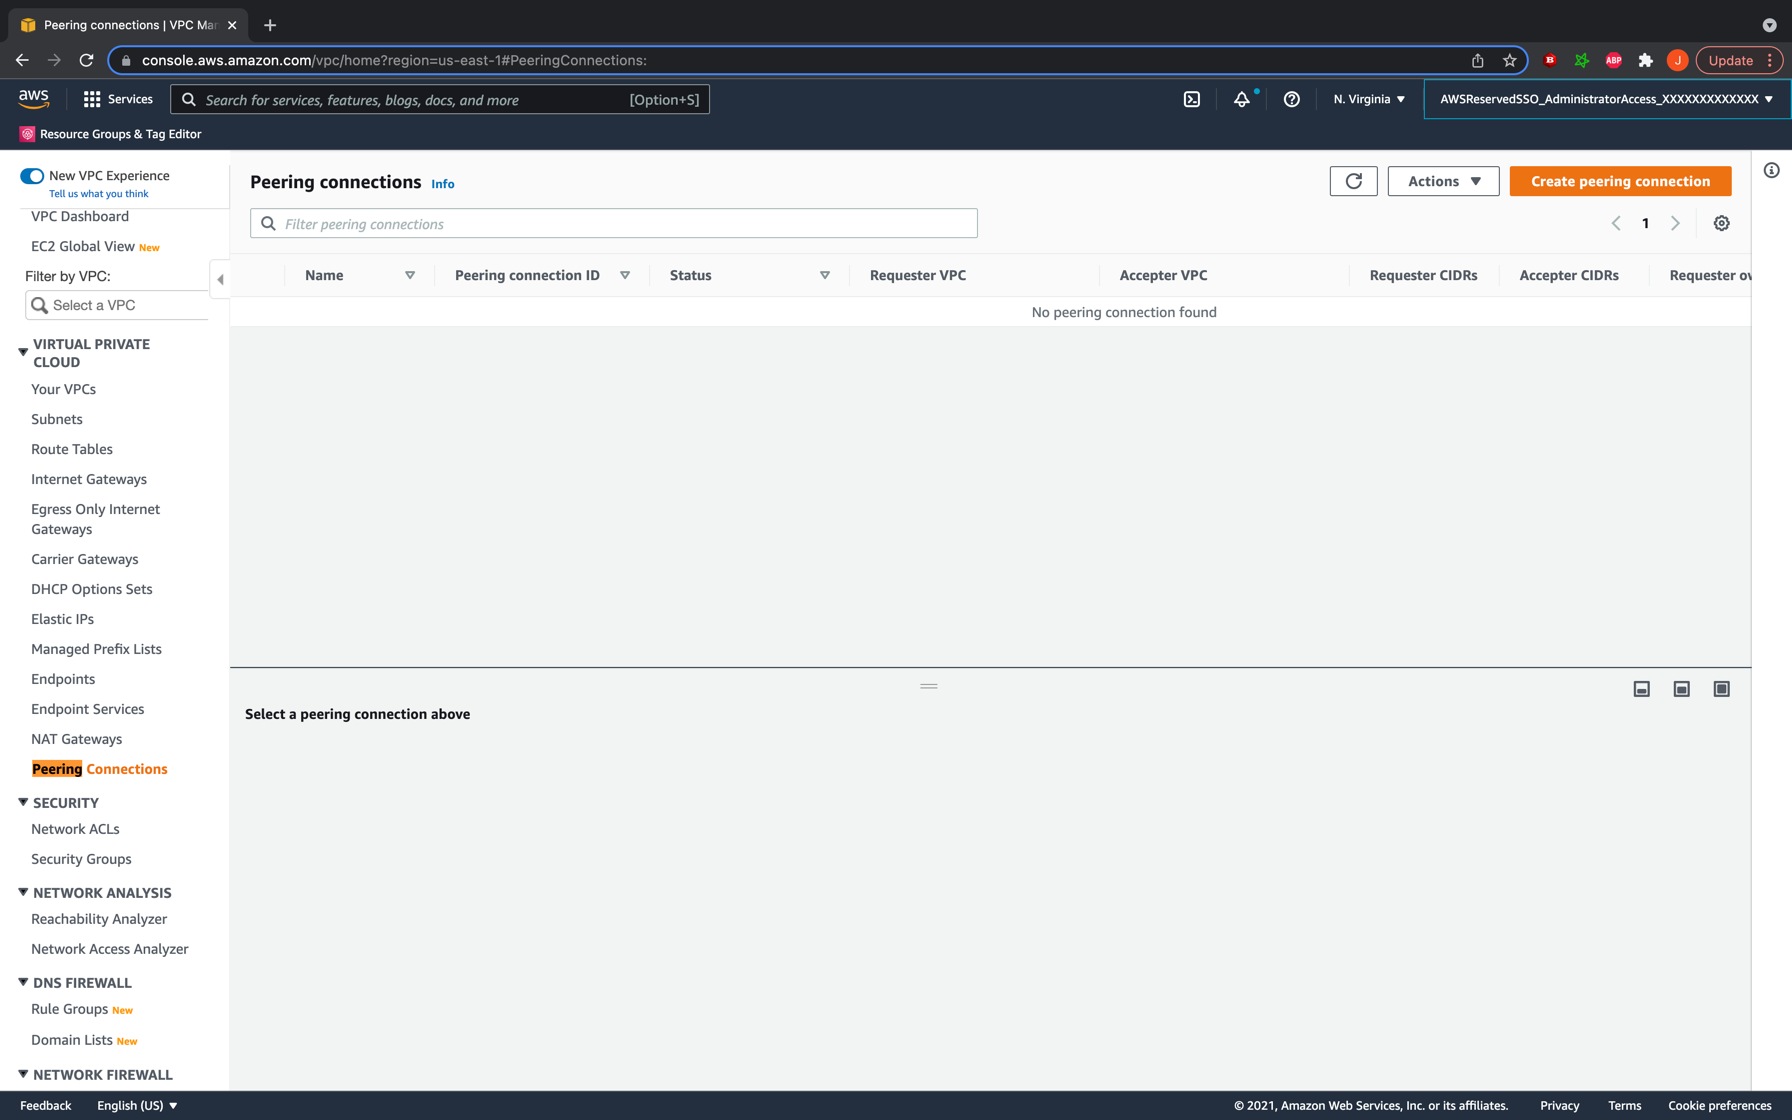
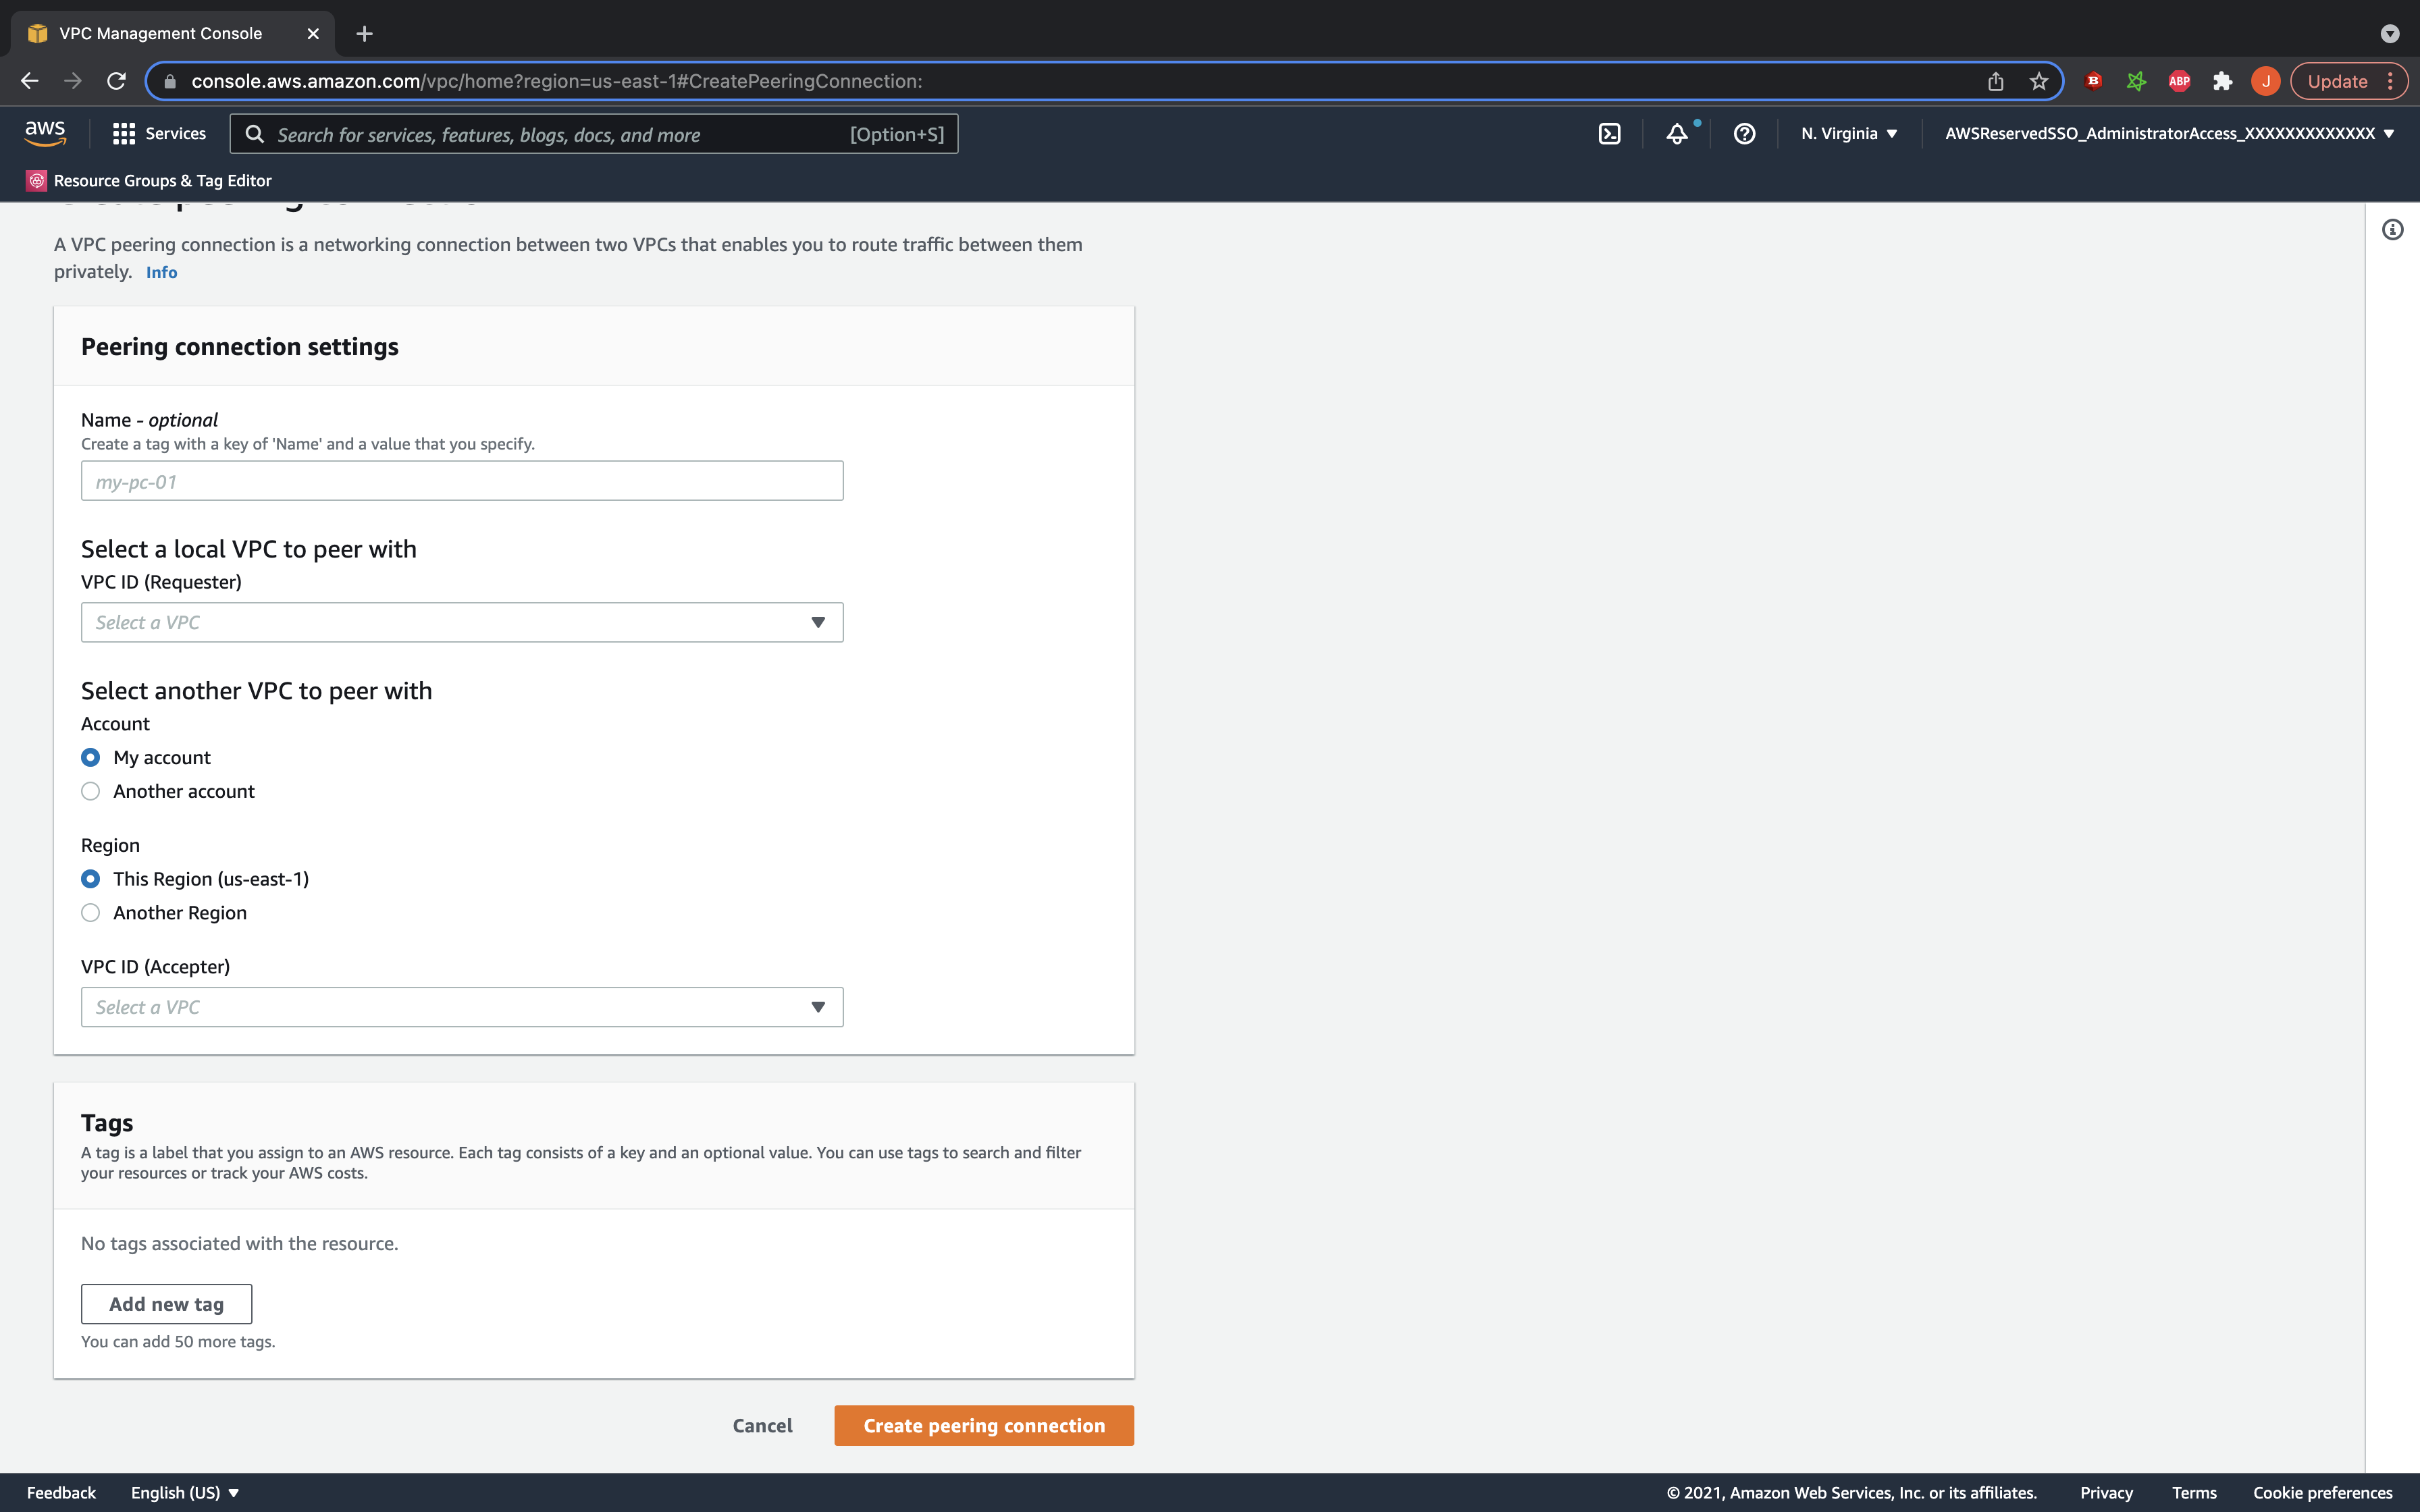
You should now see all your existing VPC peering requests. We shall now be creating a new one, so go ahead and click the button at the top right to begin. The UI will now prompt you for details about the connection. Go ahead and give the connection a proper name, and add your initiating VPC id as the requester. Enter the data for the accepter VPC and hit the button to create the peering connection.
Accept the Peering Connection
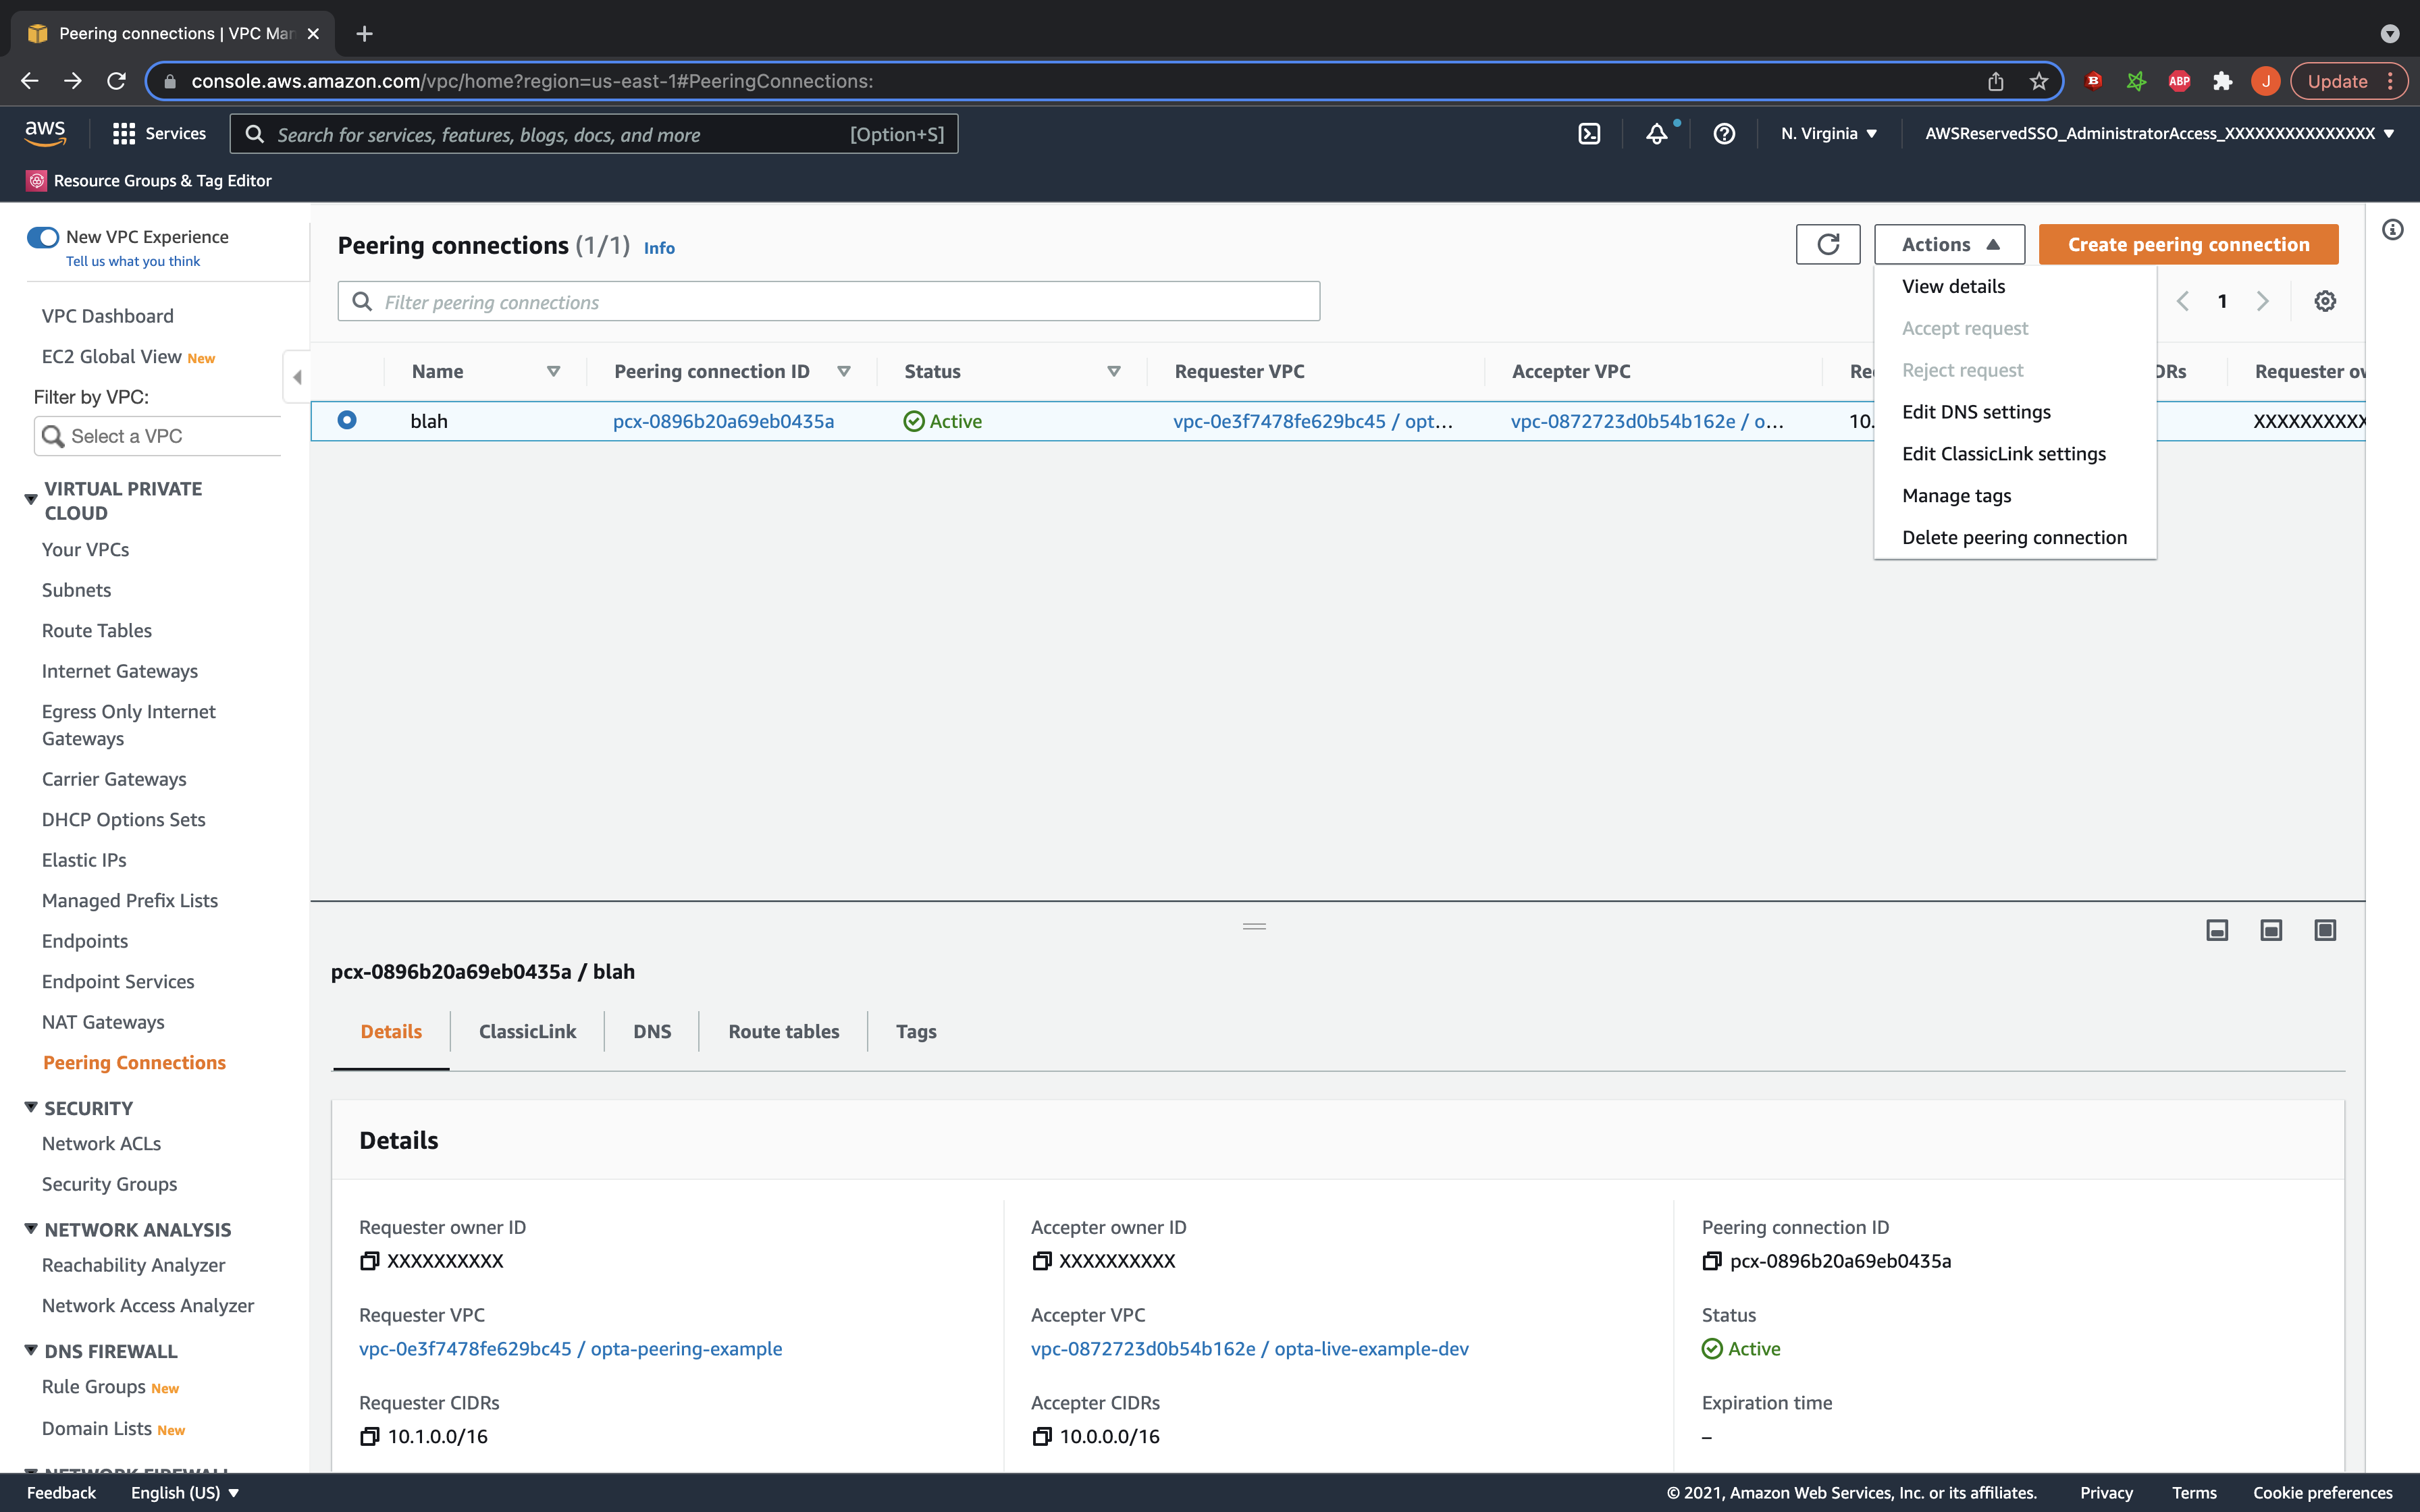
Once the peering request is sent, go to your accepter VPC’s account and region and under the peering connection listings you should see the new request pending. Select it and accept it. Your VPC is technically now peered, but there are additional steps we need to do.
Set the Requester VPC’s Route Tables
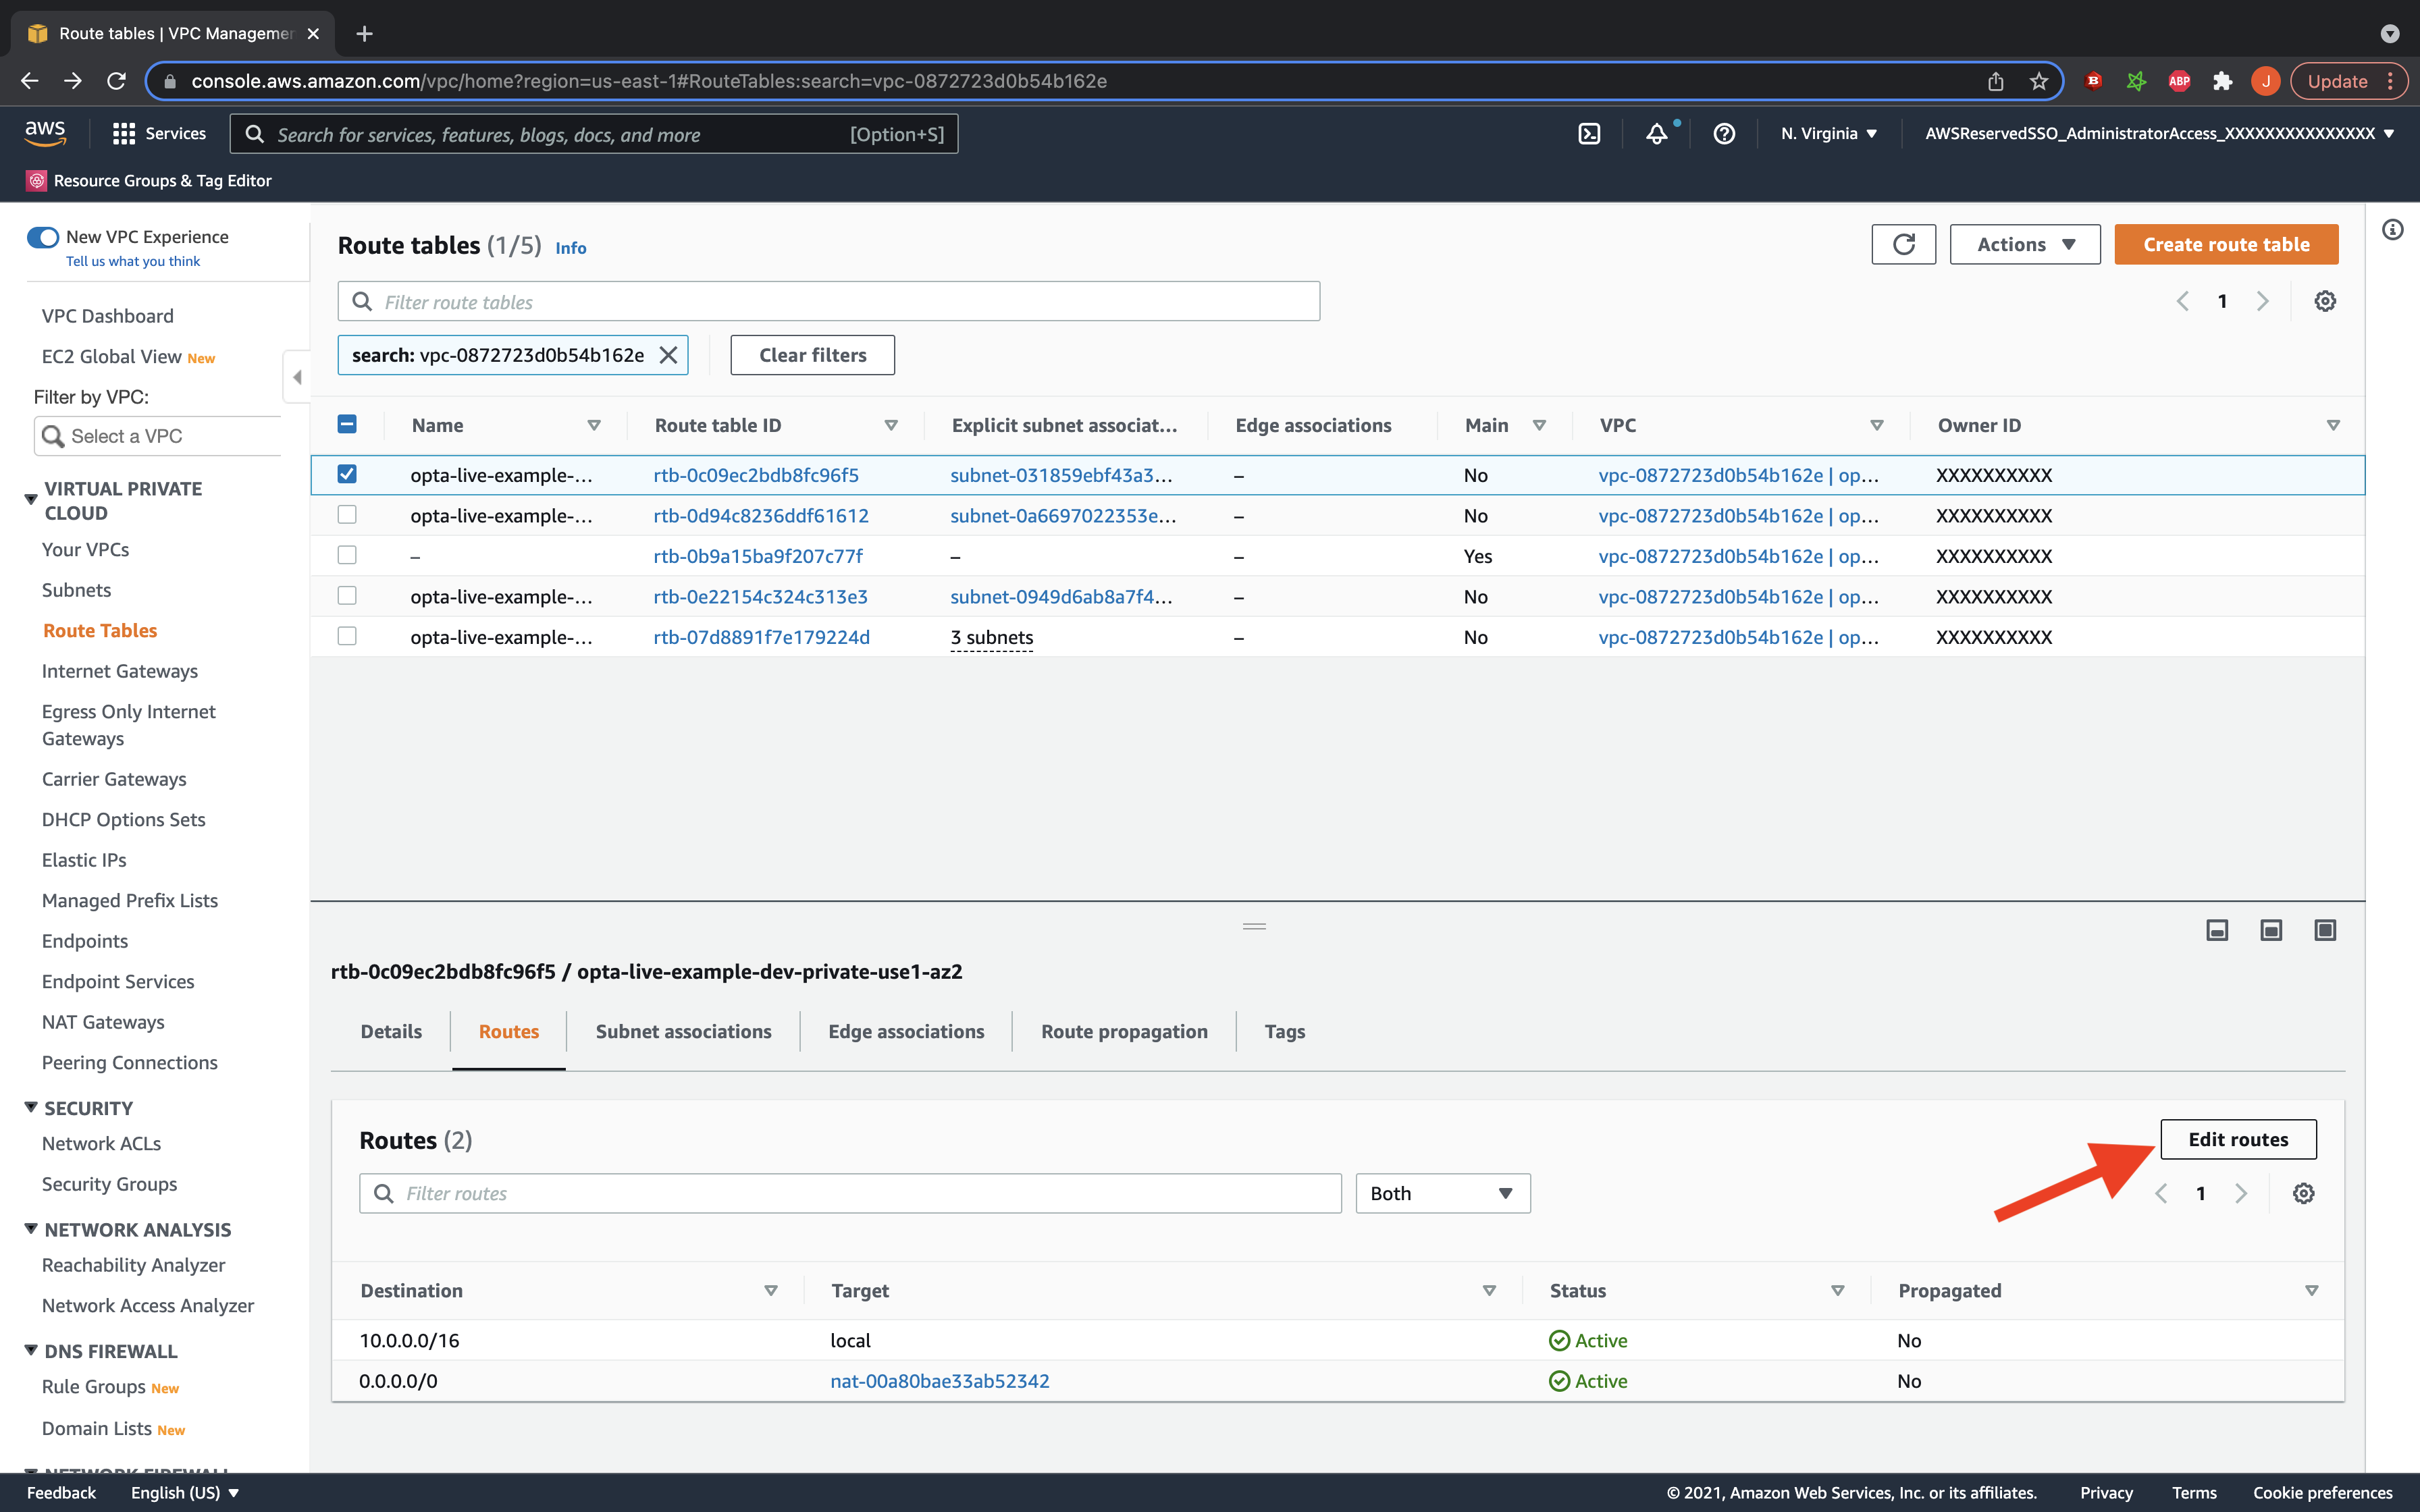
Now that the peering is established, we need to set the routes in your subnet route tables to direct appropriate traffic to the peering connection. On the VPC page of the AWS console in your request VPC’s account, go to the route table section and filter by your VPC id. You should now see the route tables for your VPC listed in the console. For each of them, click on the routes tab and select to edit routes. You will now add a new route with the destination being the accepter’s CIDR block, and the target being the peering connection established. Do this for each route table.
Set the Accepter VPC’s Route Tables
Repeat the process for the accepter VPC’s route tables, and set the destination to the requester’s CIDR block.
Enable DNS Resolution
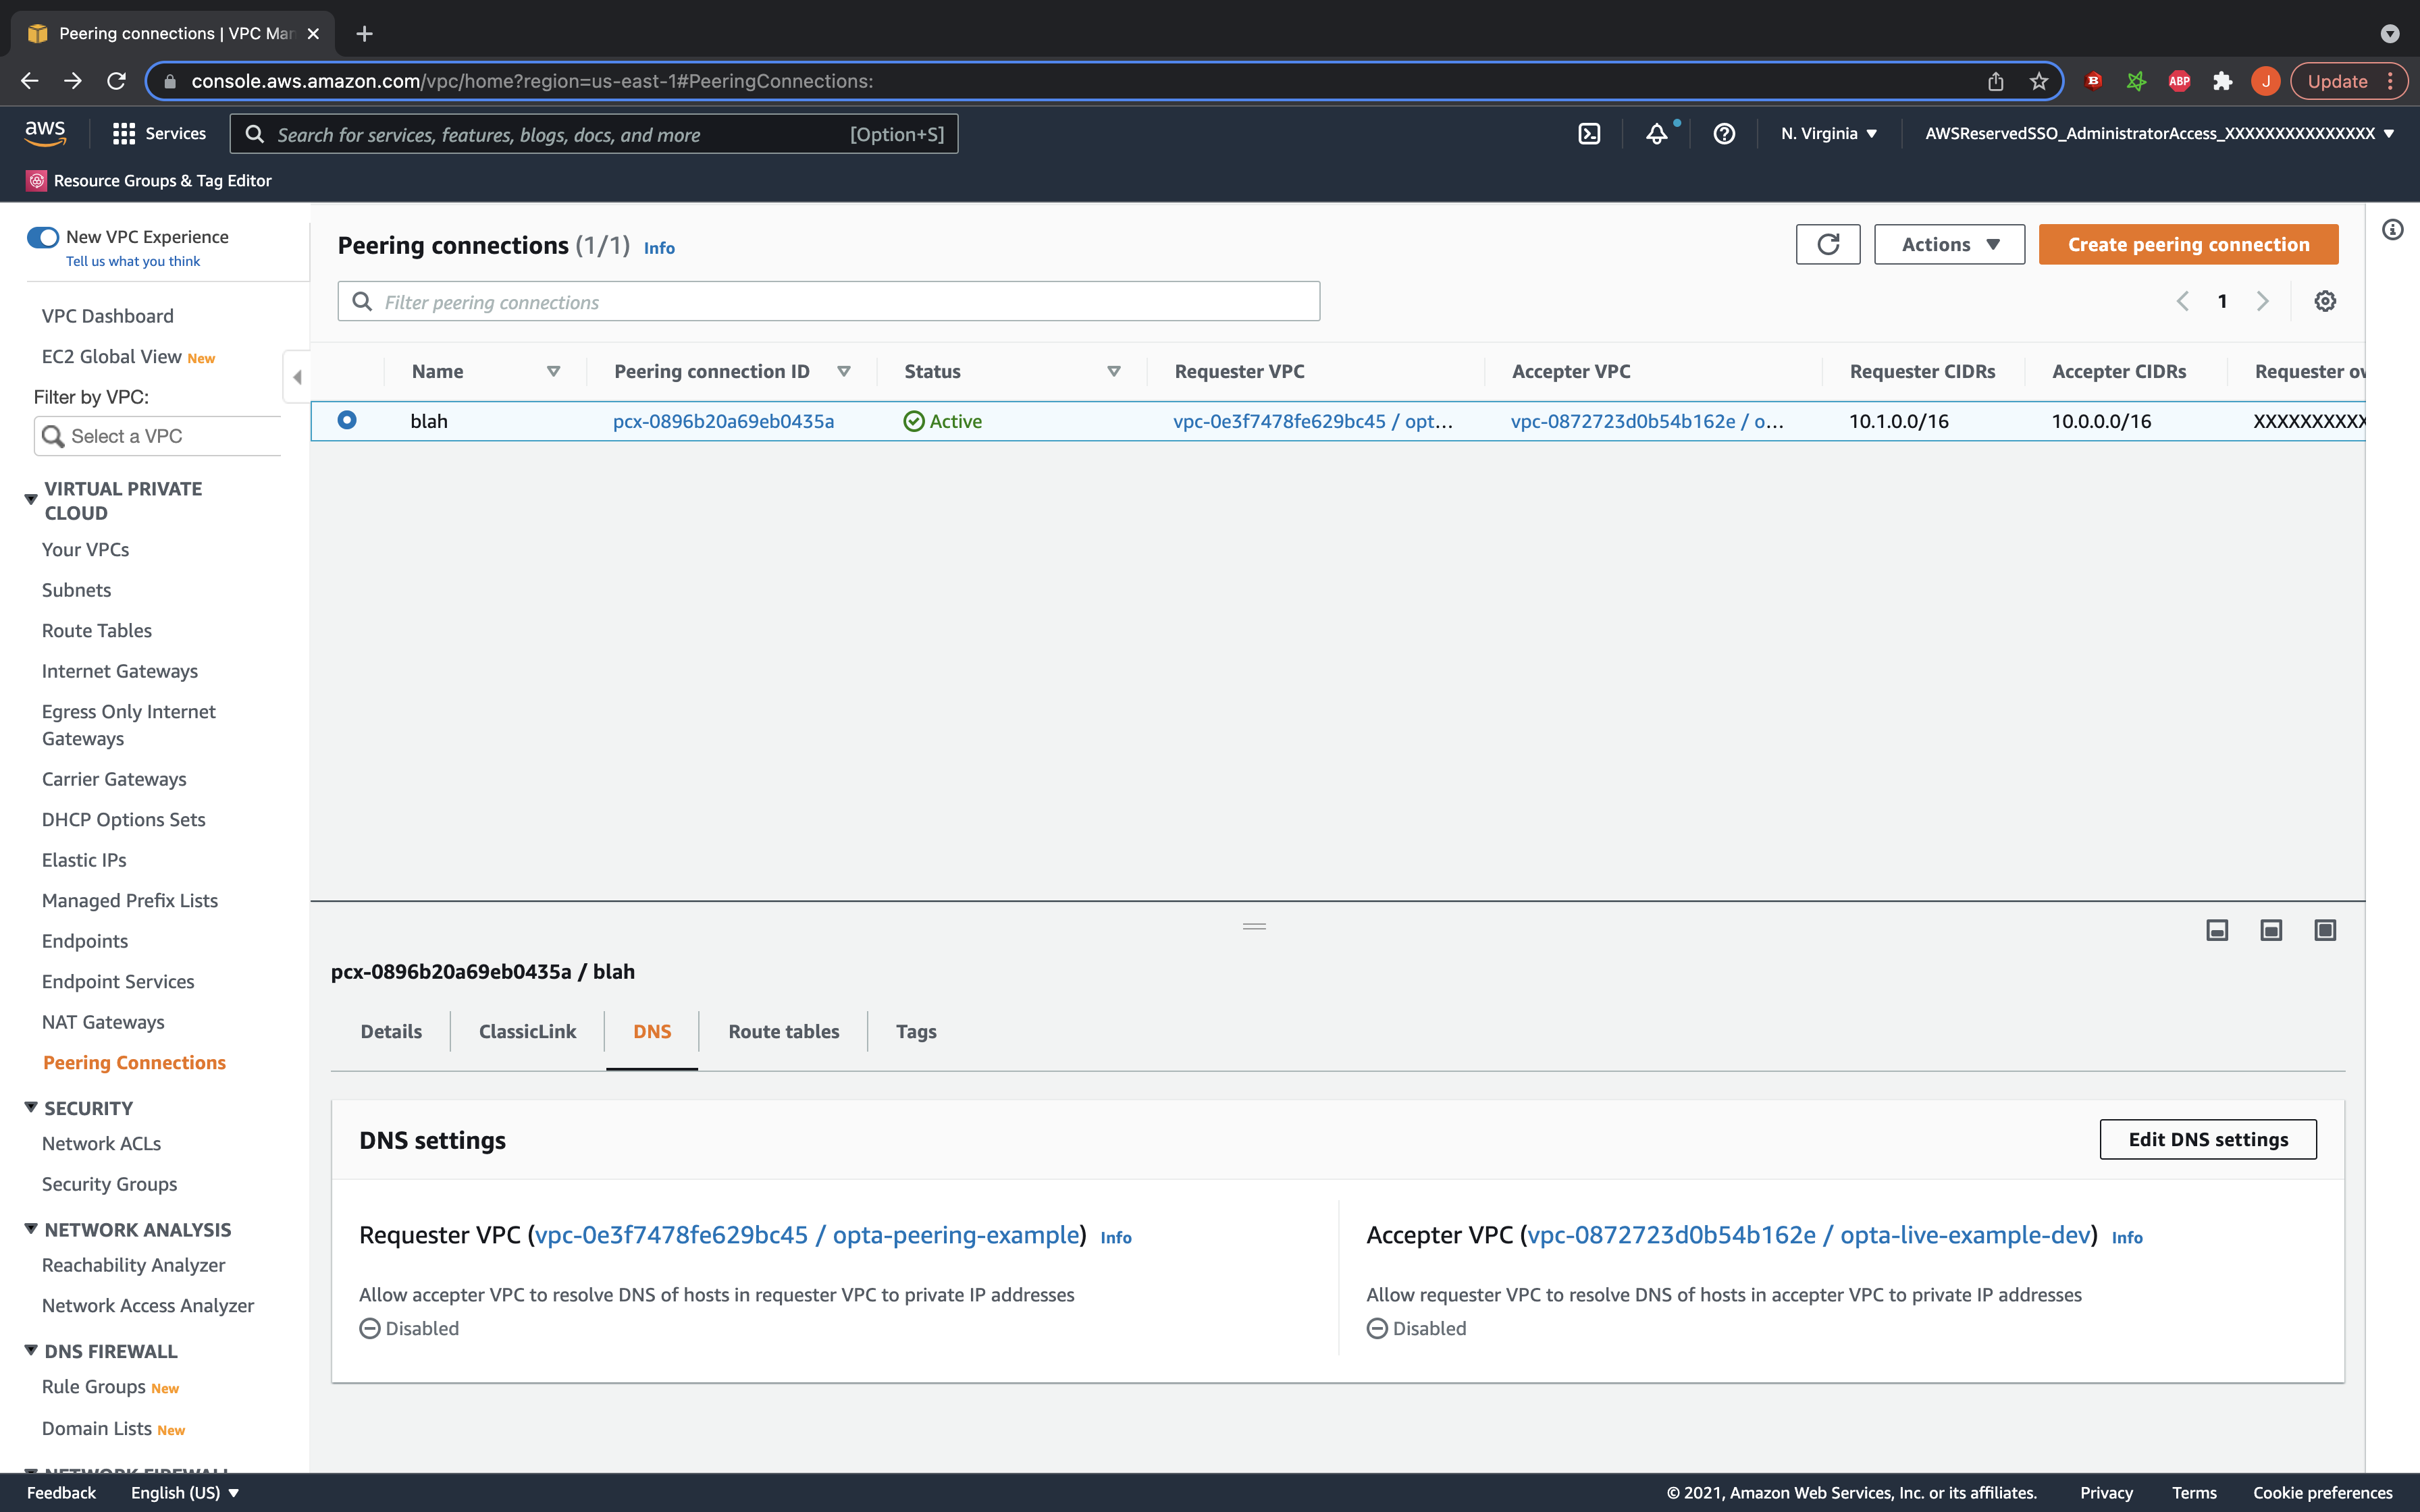
Lastly, if you are using private hosted zones, then you might also want to enable DNS resolution. This allows your private hosted zones to be recognized across the peering connection in the other VPC. To do so, simply go back to the peering connection details, and under the DNS tab, click to edit DNS settings. In there, click to accept DNS resolution– you need to accept for both VPC (so to check boxes total) and will need to look in the peering connection description in both VPC regions/accounts if the connection is cross region or account.
Further Guides
Feedback
Was this page helpful?
Glad to hear it! Please tell us how we can improve.
Sorry to hear that. Please tell us how we can improve.